Independence Day Cake
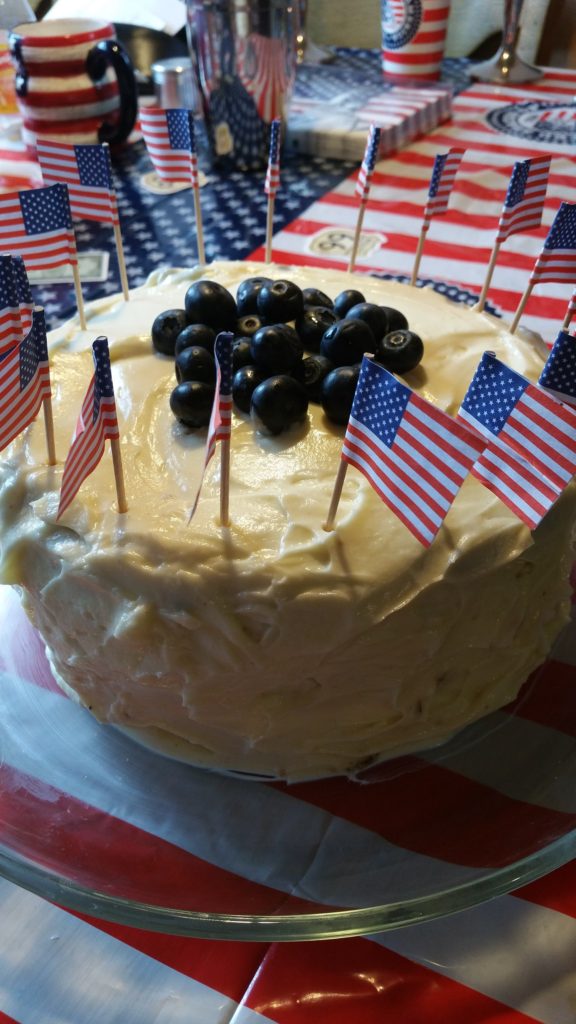
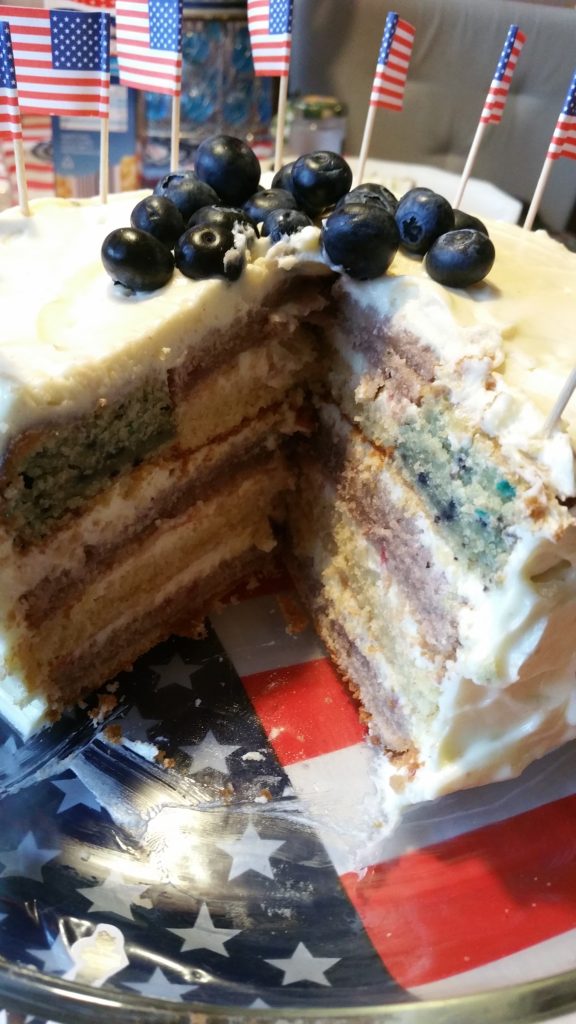
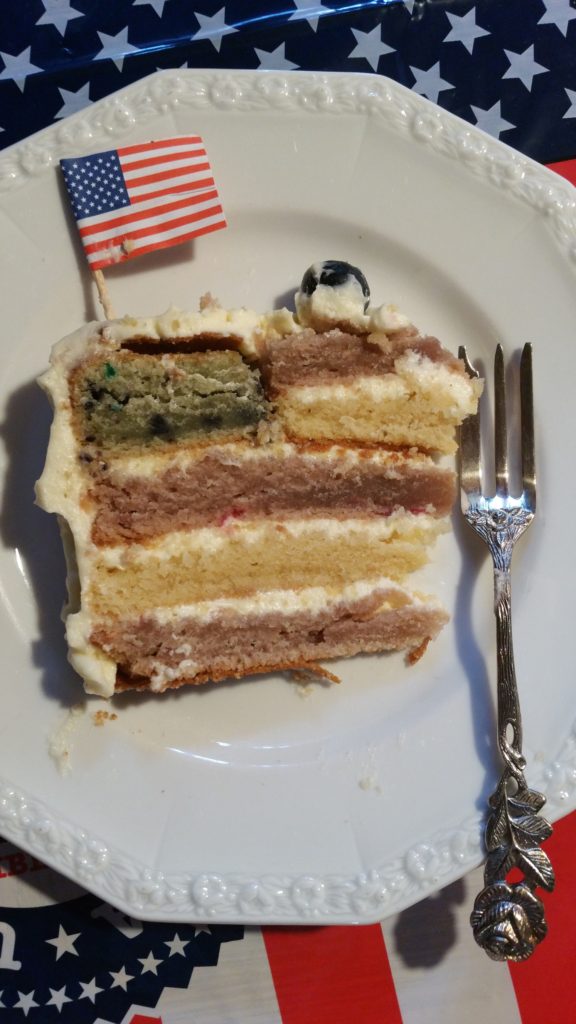
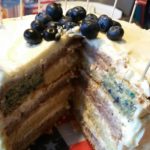
Are we celebrating Independence Day? You bet we are! And here is a layered Independence Day Cake to do so in style. The outside of the cake is cream frosting. You can make it yourself or buy it, like Betty Crocker Rich & Creamy Vanilla Frosting. Also I decorated with blueberries and flags. The big surprize is the inside of the cake! It’s a flag.
It is actually quite easy to get the flag effect. You only need red and blue food color. However, you coloring depends on how bright you want the colors to look. I used fruit juices. They don’t color the cake as brightly, but at least they are not artificial. So it is your choice.
For the batter use your favorite cake mix or make plain vanilla batter yourself. Anything will work as long as you like it. Then you need to seperate the batter into 4 portion sand fill it into round 8 inch cake pans or similar ones. Two portions for the red cake, one for the white (plain) cake and one for the blue cake. The red cake gets two portions, because we need it to be higher than the other ones so we can cut it into 4 layers instead of 2, once it is baked. So all the cakes have to be cut horizontally, except for the blue one. The red cake gets cut into 4 layers, the white/plain one into two. I use string for that, but it can be done with a big knife as well.
Next take a round bisquit cutter 4 inch in diameter. However, you can use a bowl with that diameter, too, which is what I did. If you use different size cake pans, make sure the center cutout is about half the diameter of the whole. Cut out the center of the blue cake. Put center aside. Do the same with 1 layer of red and 1 layer of white/plain cake. And here you keep the centers and put the outside ring to the side. They will replace the blue center piece.
Then you layer the cake. Always put frosting on the layers so they stick together. You start with red, then white then red again. Now take the blue cake ring as the next layer. Remember it is the hight of two layers and has no center. So layer the two center pieces of red and white cake and fill in the center with them. Now the inside of the cake is finished.
Finally the last step is to cover the layered cake with frosting and decorate it with anything red, white and blue or your favorite decoration. I used blueberries and little flags. Now the layered Independence Day Cake looks beautiful and it will make a great ID4 decoration itself. Moreover it can serve as the center piece of your table. And then, every time you cut a piece of cake, you will see the flag.
Happy Independence Day!
Independence Day Cake
Equipment
- Blender
- mixing bowl
- round cake pan
Ingredients
- 1 1/2 cups margarine butter is great too
- 4 cups flour
- 2 cups sugar
- 4-6 eggs depending on size
- 1-1 1/2 cup milk depending on how many eggs
- 1/4 tsp salt
- 1 tsp baking powder
- 1-2 tbsp vanilla
- 1 pck Betty Crocker Frosting
- OR
- 1-2 pck cake mix
- 1 pck Betty Crocker Frosting
Instructions
- Blend sugar and margarine until fluffy. Slowly add eggs. Then slowly add flour.
- Seperate batter into 4 parts. Color 2 parts red, one part blue and leave the last part as is (white/plain). Pour batter into cake pans and bake for 30min at 350°F/180°C.
- After cooling cut cakes horizontally. Red cake = 4 layers, white cake = 2 layers. Do not cut blue cake horizontally.
- Take a bisquit cutter or bowl about half the size of cake pan. With that cut out the centers of the blue cake and of 1 layer of red and 1 layer of white.
- Layer the cake with frosting inbetween. Start with red, then white, then red again. Now use the blue cake ring. Finally fill the center of the blue cake ring with the red and the white center pieces. Cover cake with frosting.
- Decorate the cake with red, white and blue or your favorite ID4 decoration.