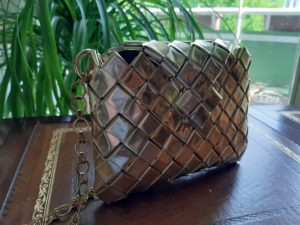
Waste2Wonderful Purse

As you probably know by now recycling waste items is really my thing. Here is my Waste2Wonderful Purse made of coffee bags. It turned out fantastic.
This is basically another version of my Little Tea Wrapper Bag and my City-Map Purse. These types of bags are also called candy wrapper bags, but they can be made from all kinds of materials. As recycling goes the best ones are made out of plastic/metal foils. We all hear about and see our oceans being polluted. This is a small way of preventing pollution by turning waste into something wonderful. So let’s start collecting.
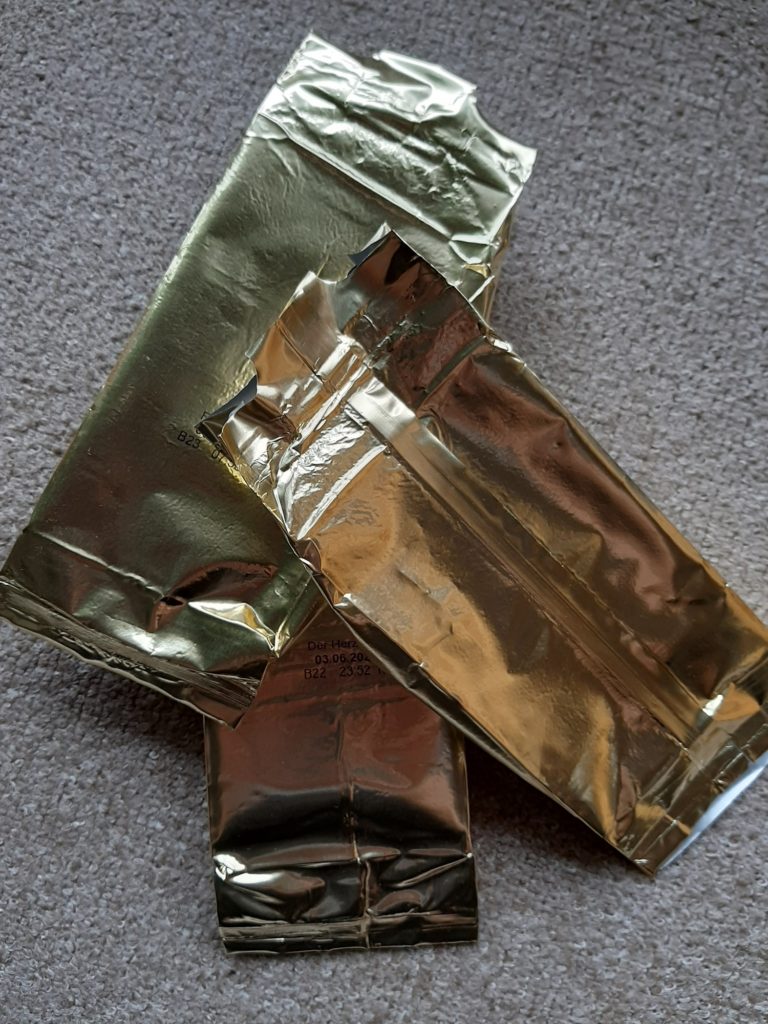
One important thing to know right away is that you will need quite a lot of coffee bags out of which to cut the pieces for the Waste2Wonderful Purse. Of course depending on the size and style of the bag or purse you are planning to make, you will need a minimum of 20 coffee bags.
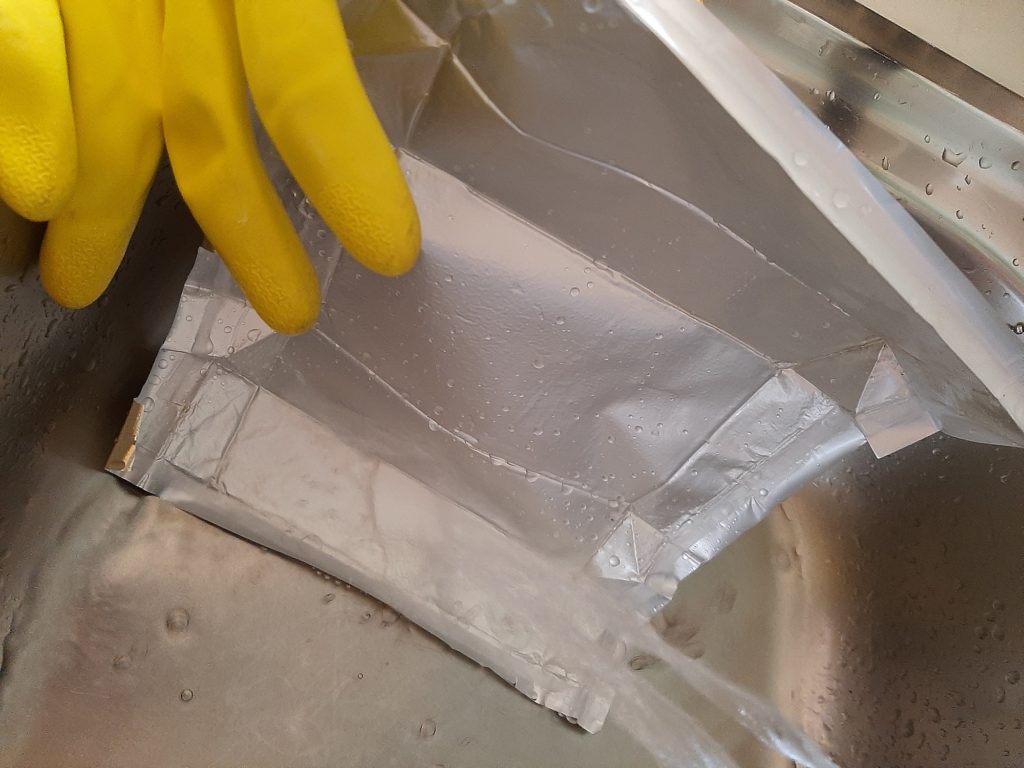
After collecting enough bags you have to carefully pull them apart and clean them. It is only coffee, but they need to be clean nevertheless. 🙂
The thing I really like about using foils of any kind to make purses is that there is no need to cover them with clear adhesive foil to make them waterproof. If you use paper, as I did with my Little Tea Wrapper Bag and City-Map Purse, the covering is necessary not only to waterproof but also for stability. Here we can use the foil as it is and just cut out the pieces we need.
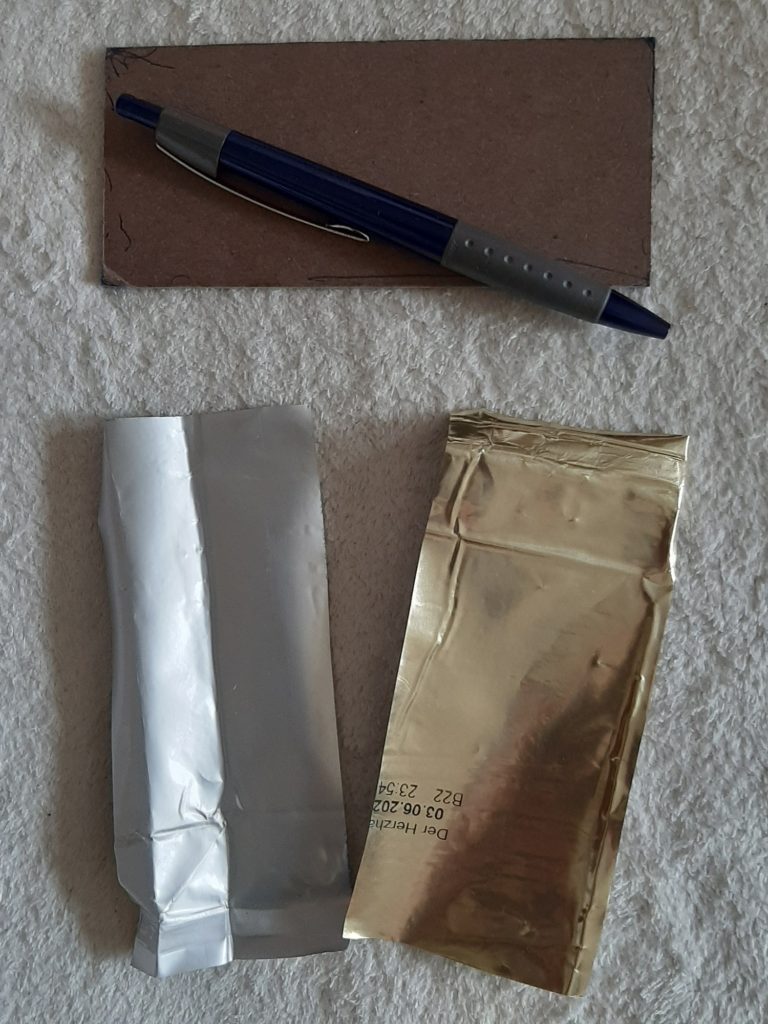
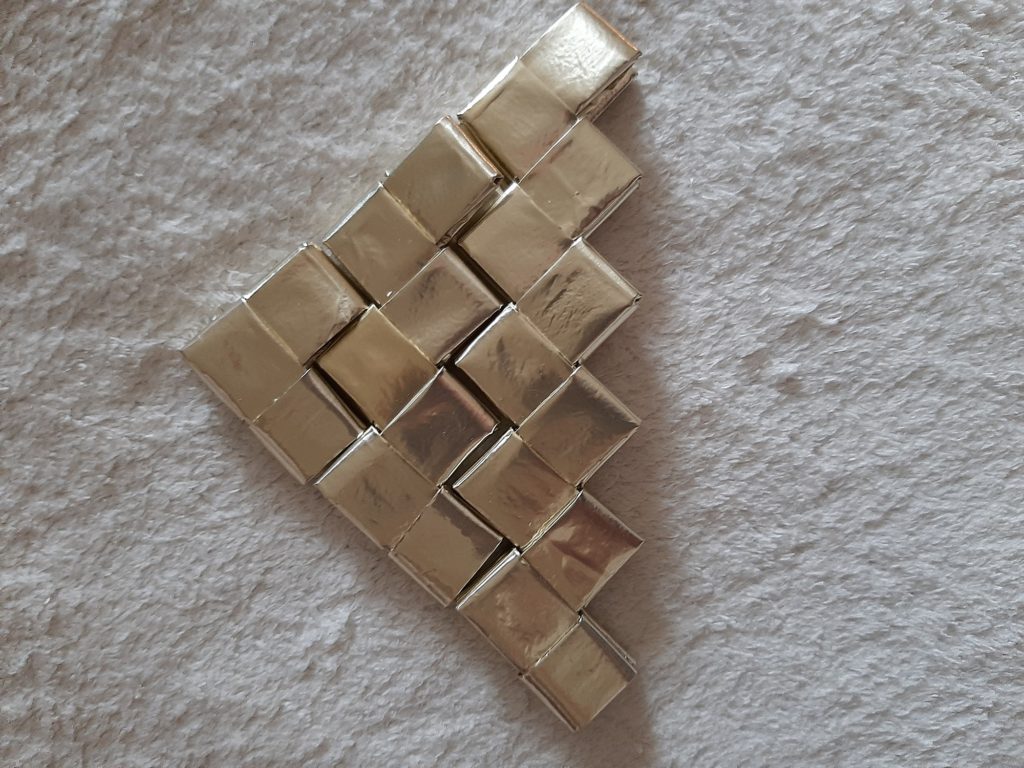
I have a template to cut out the pieces, but you can mark the foil with a ruler as well. The pieces I use are 6 x 14 cm = 2.4 x 5.5 inch in size. You can make your own sizes of course. Just remember to make them in length a little more than twice the width. You need the extra for folding.
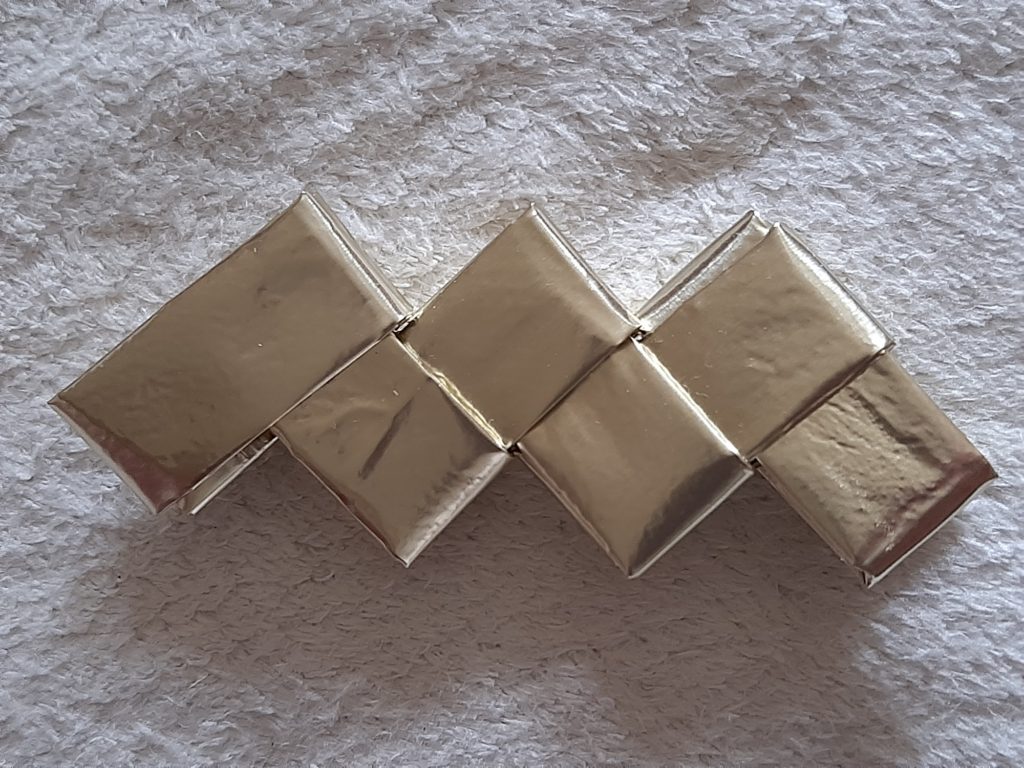
Once your foil pieces are prepared you can start folding them. After folding the pieces you stick them into each other and form long chains. Then you connect the ends so you have big rings (or small, depending on the size of your purse). You can find a detailled photo gallery on how to do that here: https://spoonsandscissors.com/diy-little-tea-wrapper-bag/
This is how you fold the papers:
1. Fold the paper longways once, good side out.
2. Then unfold again. We need the crease as a marker
3. Fold both sides in, almost right up to the crease
4. And fold them together (along the crease). Now you have a long strip with both sides.
5. Fold the strip in half
6. And unfold again.
7. Now fold in both ends almost down to the crease. Leave a small space in the center, otherwise it could be a litte wavy when you continue folding. Just try it out with one piece.
8. And now fold both sides together along the crease
9. Now you have a finished piece ready to go
After folding the pieces you stick them into each other and form long chains.
Then you connect the ends so you have big rings (or small, depending on the size of your bag).
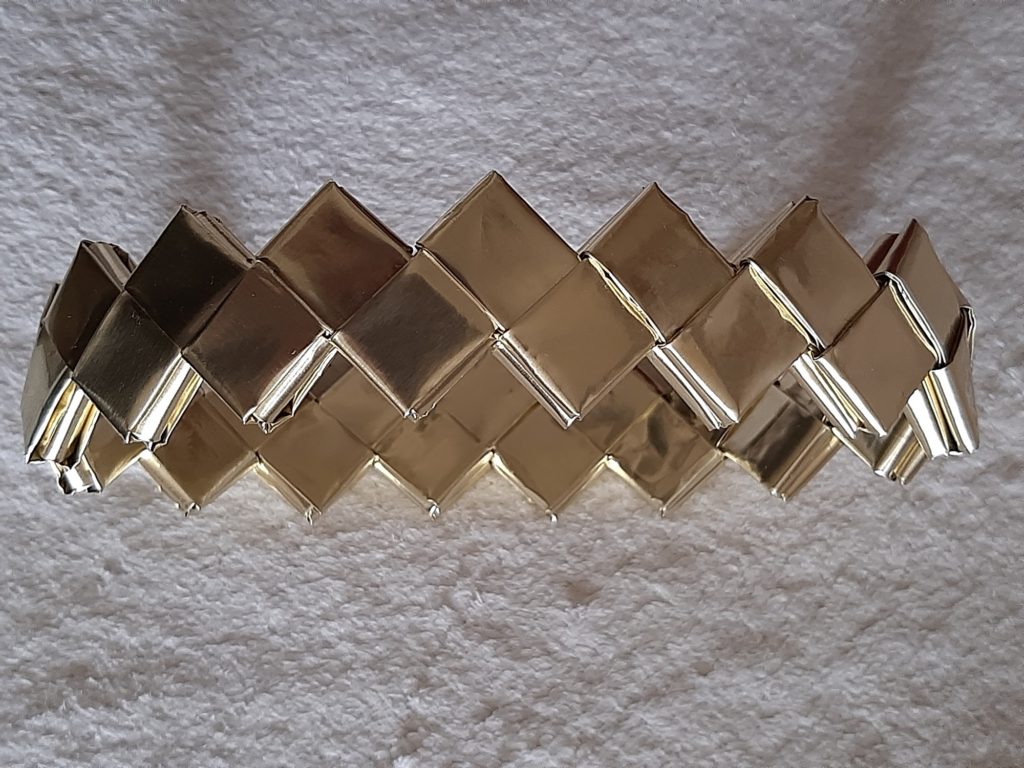
My chain rings for the Waste2Wonderful Purse consist of 32 pieces each and you need 5 rings altogether for the main bag part. When you stick the pieces into each other, make sure you use the easy side. If necessary turn the piece around so you have the good side to work with. You can find detailed pictures of the easy and difficult side here.
When you have enough chain rings for the right height of your bag stack them on top of one another and sew them together. I use a strong yarn (cotton), strong thread or fishing twine and a darning needle for that. You can buy twine for sewing, too. It has the advantige that it is clear in color and therefor less visible.
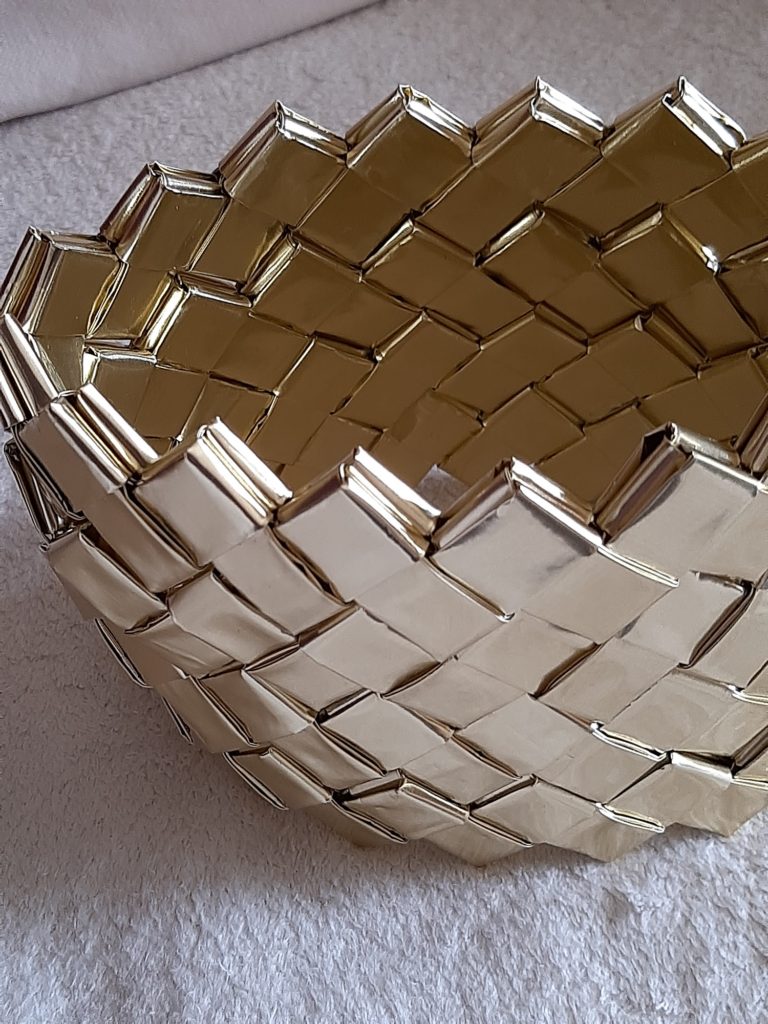
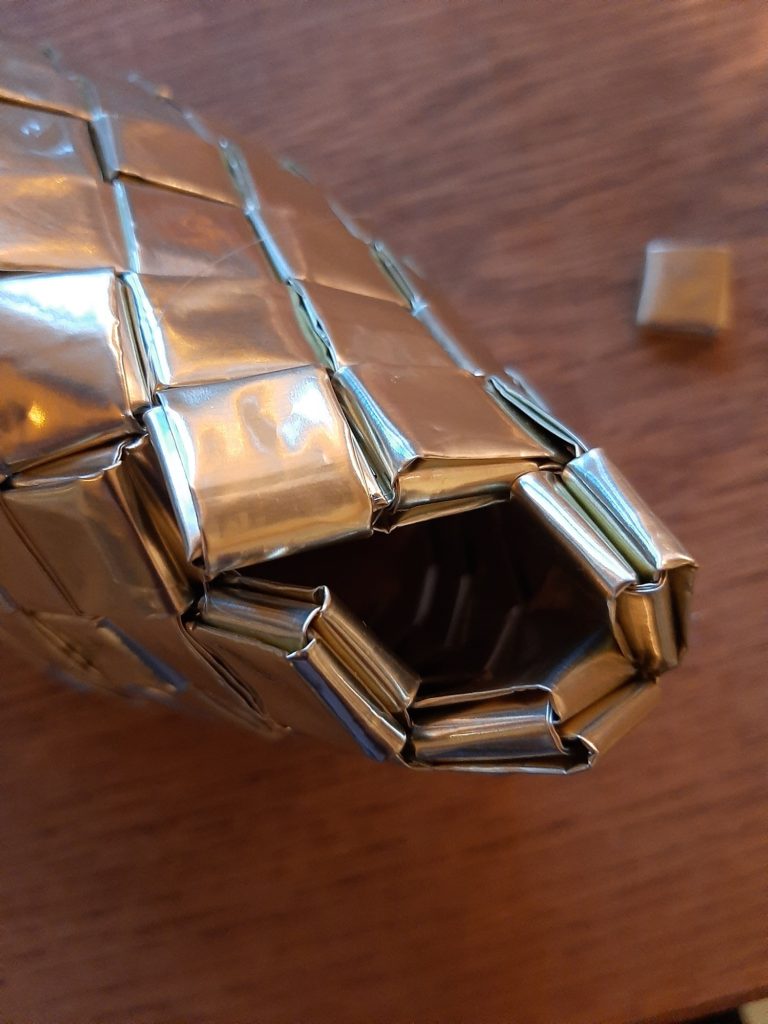
After sewing the rings together it is time to sew the bottom. It is also possible to do the bottom first. Whichever way you find more comfortable to do, that’s the way to go.
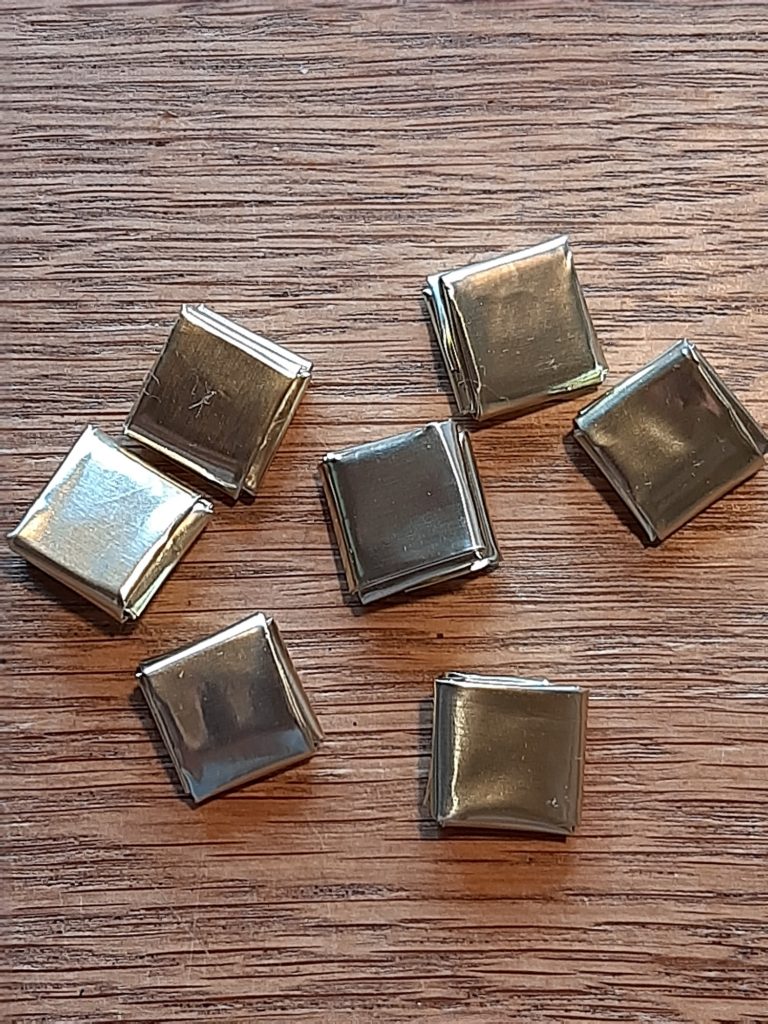
You have to carefully bend the bottom a little bit and start sewing in the little pieces, because here you have the edges meet and you need to fill the holes. You make the little pieces by cutting a normal piece in half and sticking the halfs into each other. And this will give you the desired little squares. I needed 7 for this purse.
With my other purses I used a zipper on top. But here I decided on a flap with a magnetic snap. For the flap I used short chains and extra pieces. Lay out the shape, sew them together and attach them to the top. Make sure when you are done to hide all the excess strings.

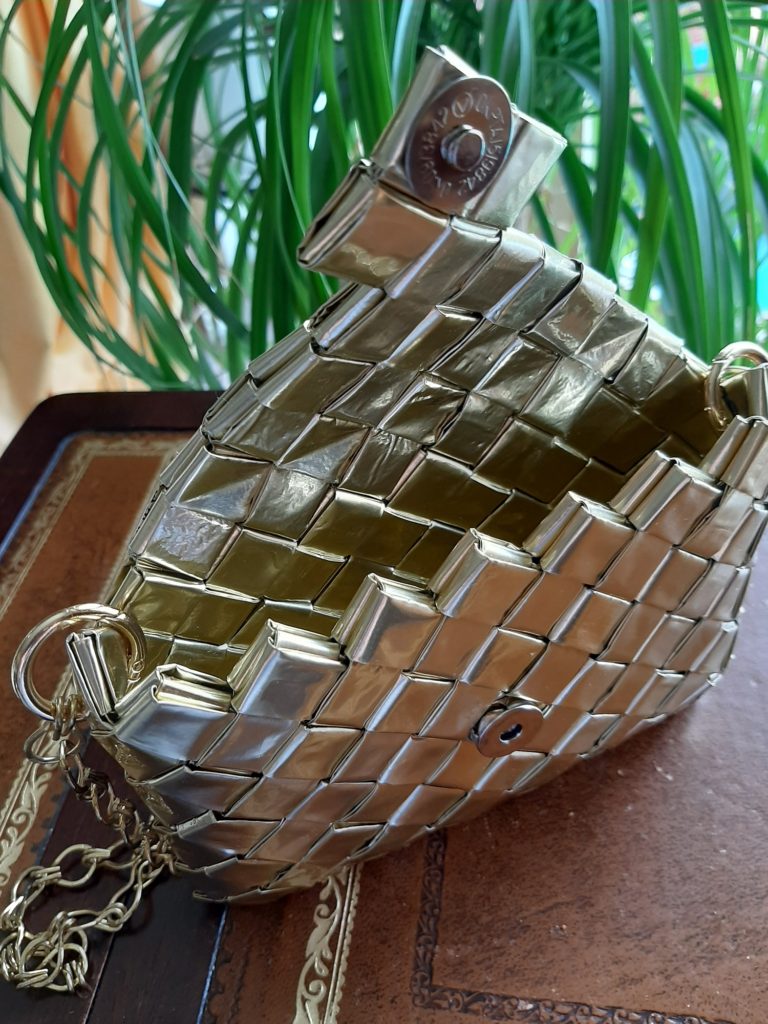
You can use the purse as a clutch or add a strap to it. Since my Waste2Wonderful Purse is made of golden foil I decided on a golden chain as a strap. Two round snap hooks attach the chain to the purse.
This is how you make the Waste2Wonderful Purse. Isn’t it fantastic?
Waste2Wonderful Purse
Equipment
- Scissors
- ruler
- Pen/Pencil
- darning needle
Materials
- ca 190 pieces foil
- strong yarn or thread
- 1 magnetic snap
- 1 strap
- 2 snap hooks
Instructions
- Prepare the foil and make ca. 190 pieces sized 6 x 14 cm = 2.4 x 5.5 inch.
- Fold the pieces and make 5 chains with 32 pieces each. Connect the ends so you have chain rings.
- Stack the rings on topof one another and sew them together.
- Make7 little squares and use them to sew the bottom of the purse shut.
- Make little chains and some squares to make a flap. Sewthem together and attach to the top of the bag.
- Attach magnetic snap.
- Attach snap hooks and strap.