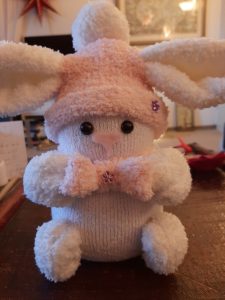
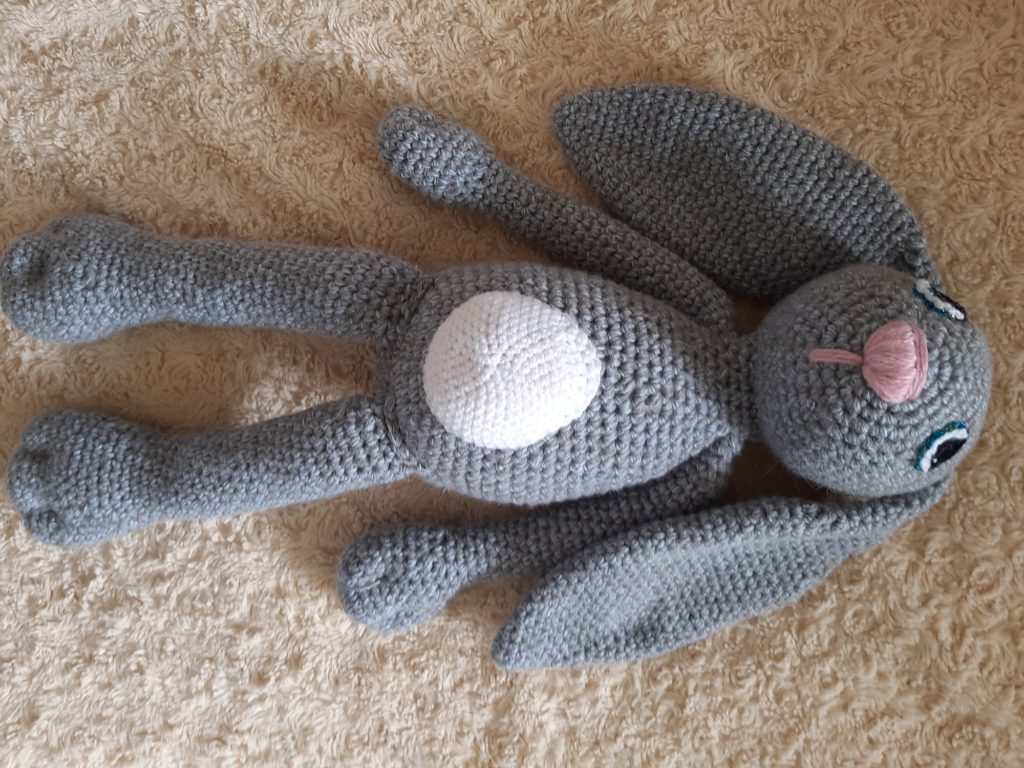
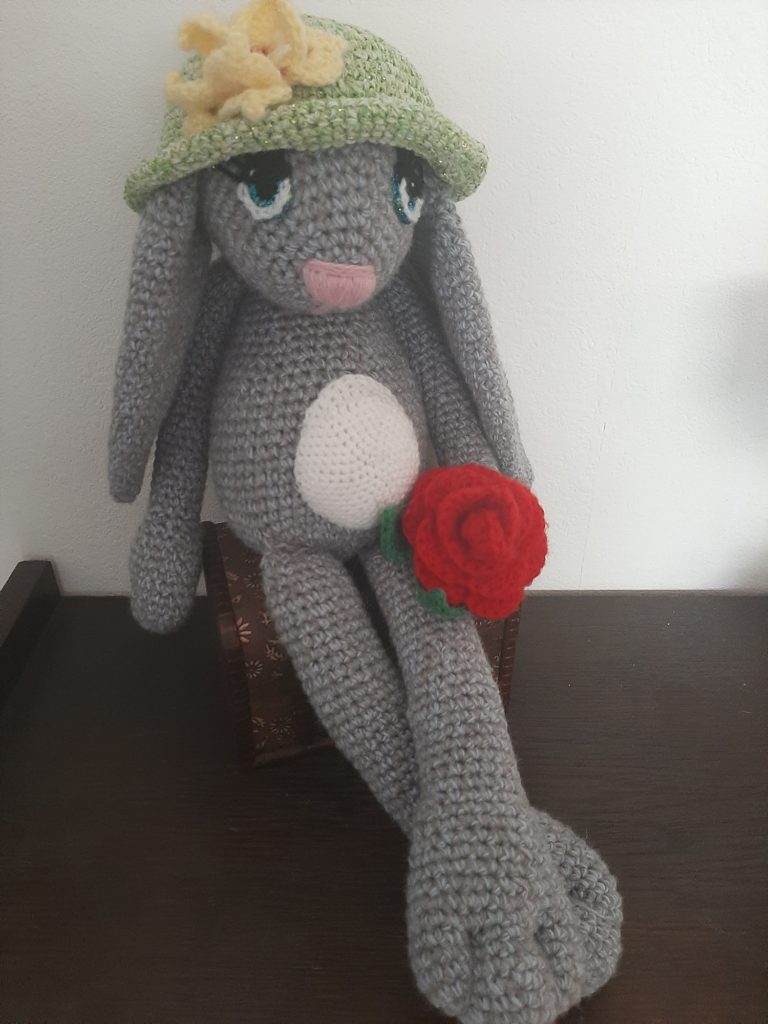
Lucie Easter Bunny
As I was going through all my yarn for a new Amigurumi project I came accross a whole bunch of gray wool. It was left over from my my trials and tribulations making a vest style cardigan. Well, that didn’t work out and I unravelled everything 🙂 Instead I made a decorative pillow case and Lucie Easter Bunny.
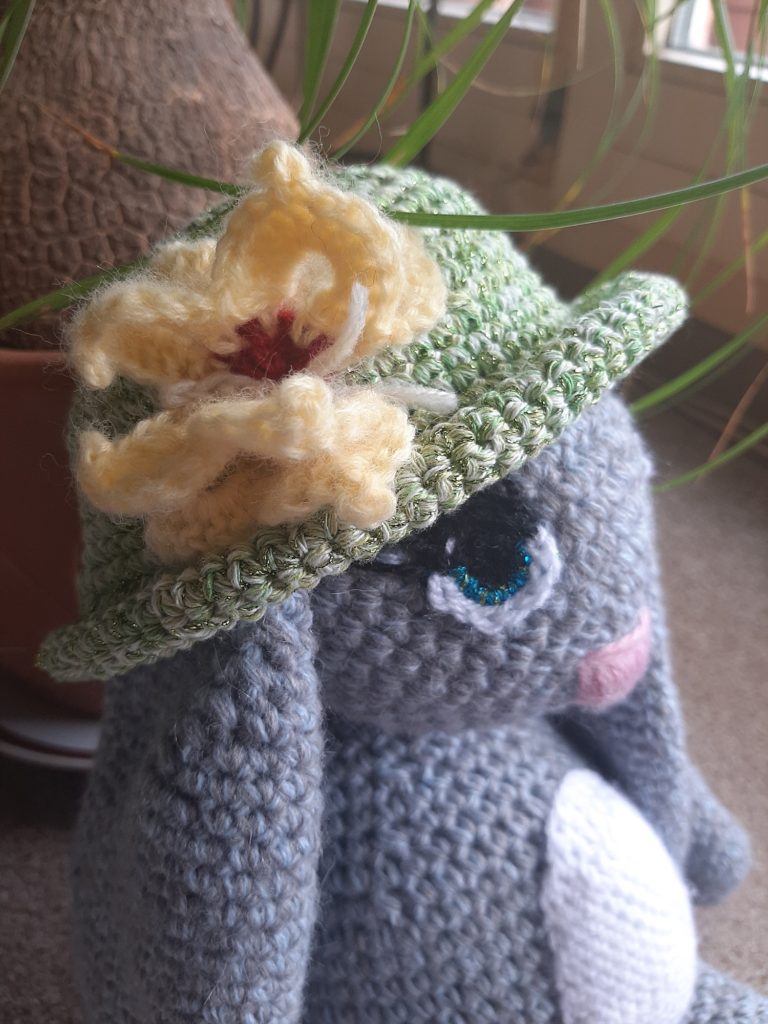
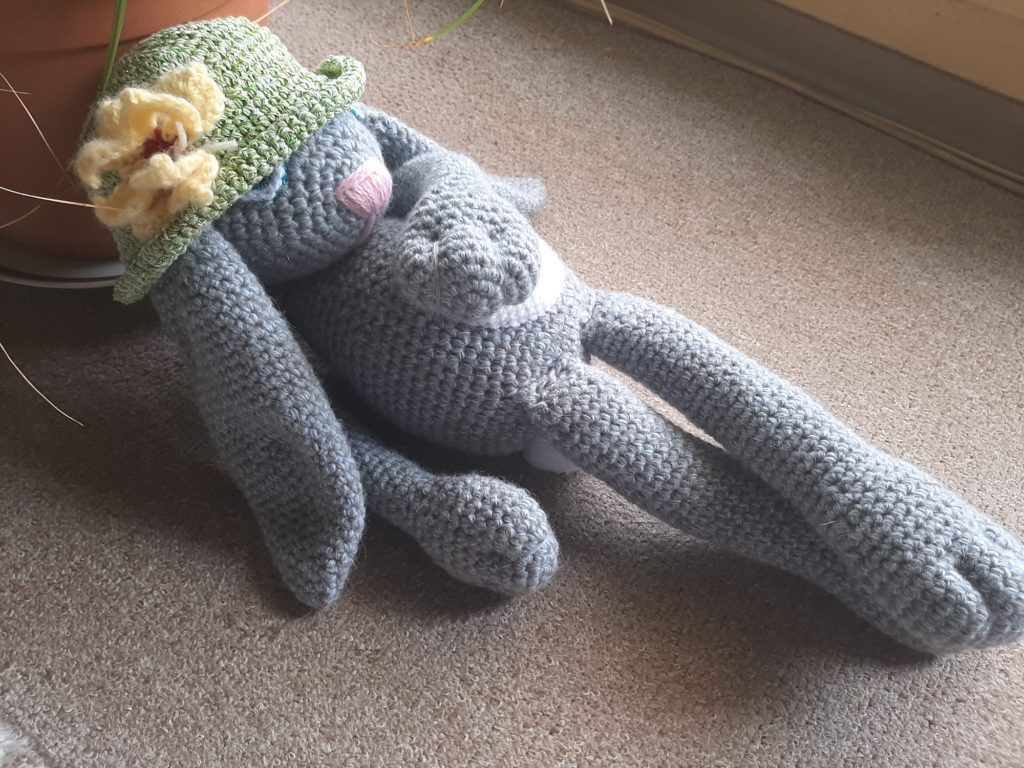
Originally I wanted my Amigurumi to be a little smaller, but I had plenty of yarn and a bigger size looked better anyway. Also I made a little sunhat for Lucie and decorated it with a cute little butterfly. Now she can relax under my Bocanea tree and take a little nap no problems.
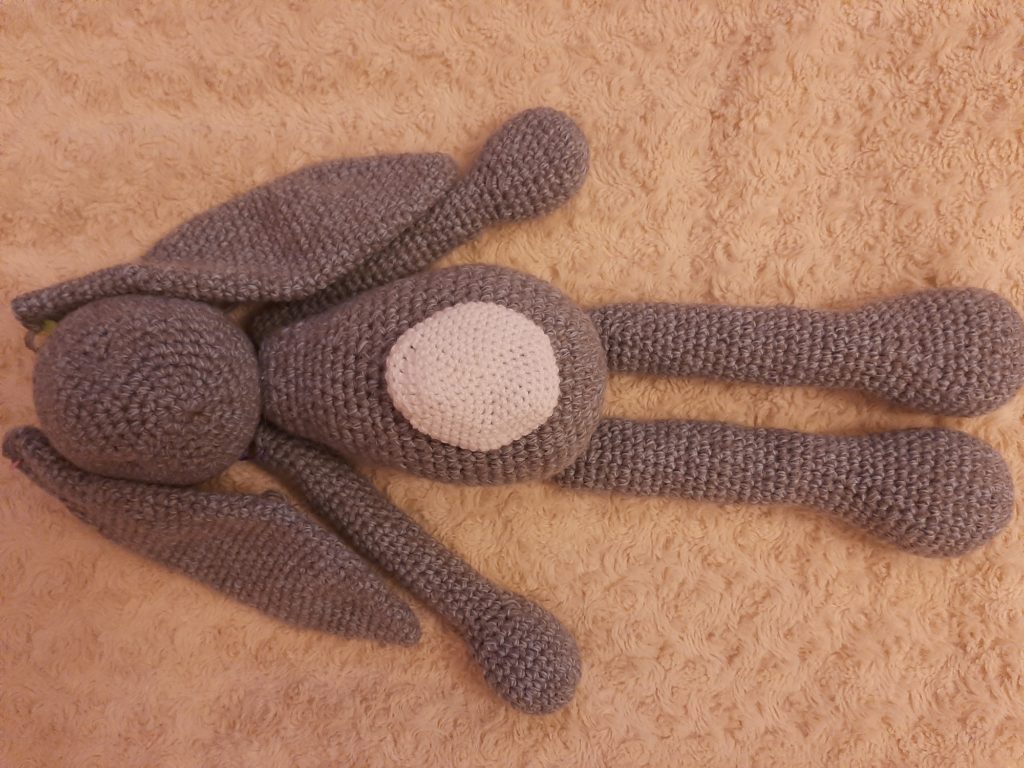
To make Lucie Easter Bunny you need to basically crochet 8 pieces: Arms, legs, ears, body and head. The extra items are two eyes, the white belly part, a hat and a butterfly. I used a ready-made pompom as a tail, but of course you can make one yourself just as well.

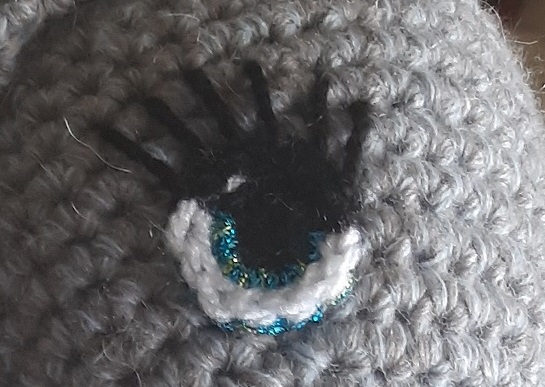
hat eye
First you make the head. For all the pieces I used a no. 4 crocheting hook. You start with the usual magic ring and add stitches regularly until you have the diameter you want for the head. You decrease a little differently so the head turns out to be a little more egg shaped than a sphere. After filling it with fiber fill you prep for the eyes and stitch the nose onto the small end.
As you can see on the picture there are “dents” for the eyes for which I used a string to pull in the sides. You tie the string on one side and pull it straight through to the other side. Then you pull the string tight until you have the desired indentation and then tie a knot and hide the excess string. I guess this is not absolutely necessary, but I think it shapes the head nicely and makes it easier to attach the eyes correctly.
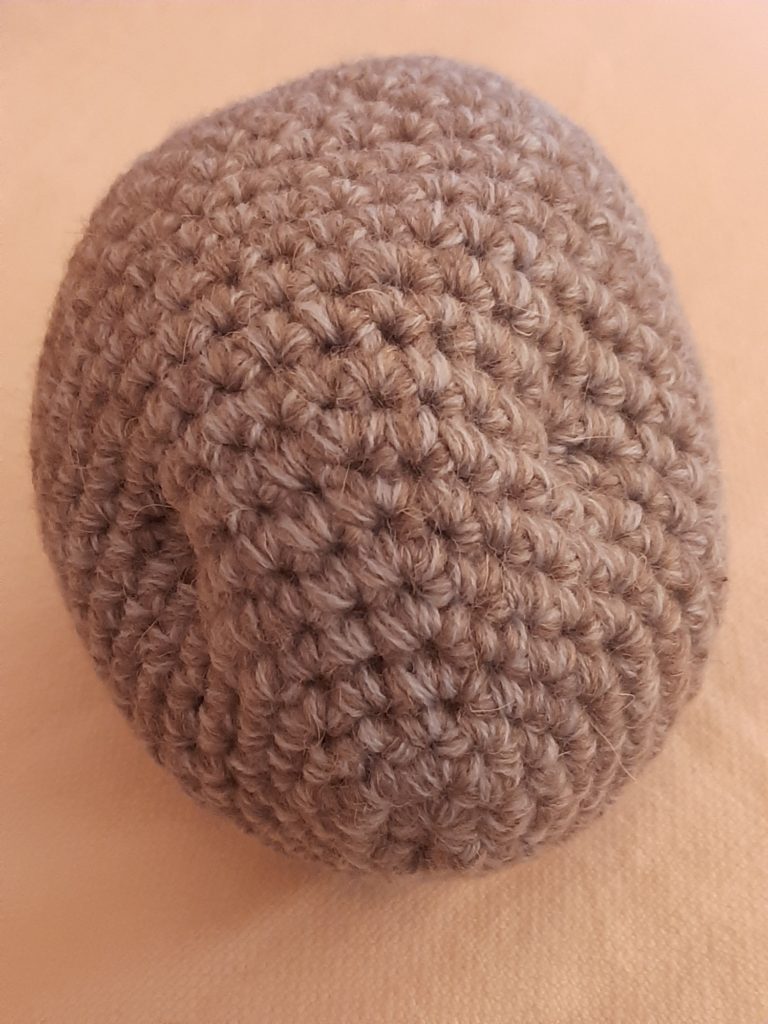
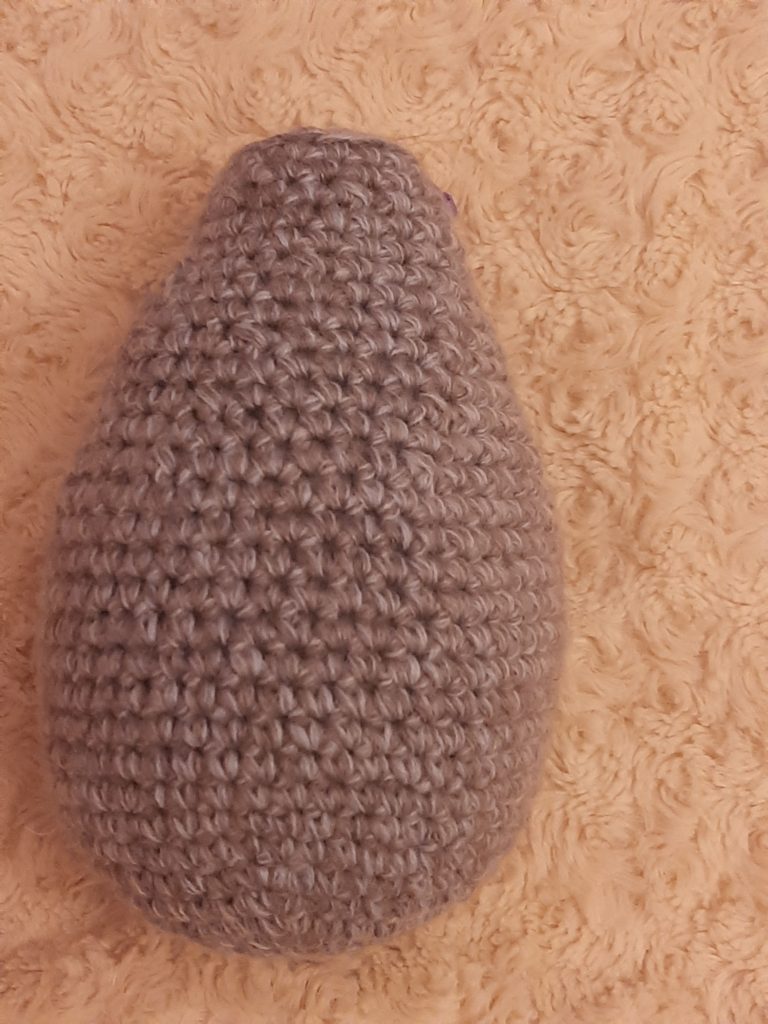
Next you crochet the body. Again we start with a magic ring and increase until we have the right diameter for the body. Also by decreasing in different steps the body will get a longer pear like shape. Stuff it with fiber fill in the end. The little white belly part you have to make seperately and sew it on.
body body with fiber fill
When the body is finished you can attach the head already or leave it until all parts are ready to be attached. Then you make the arms and legs.
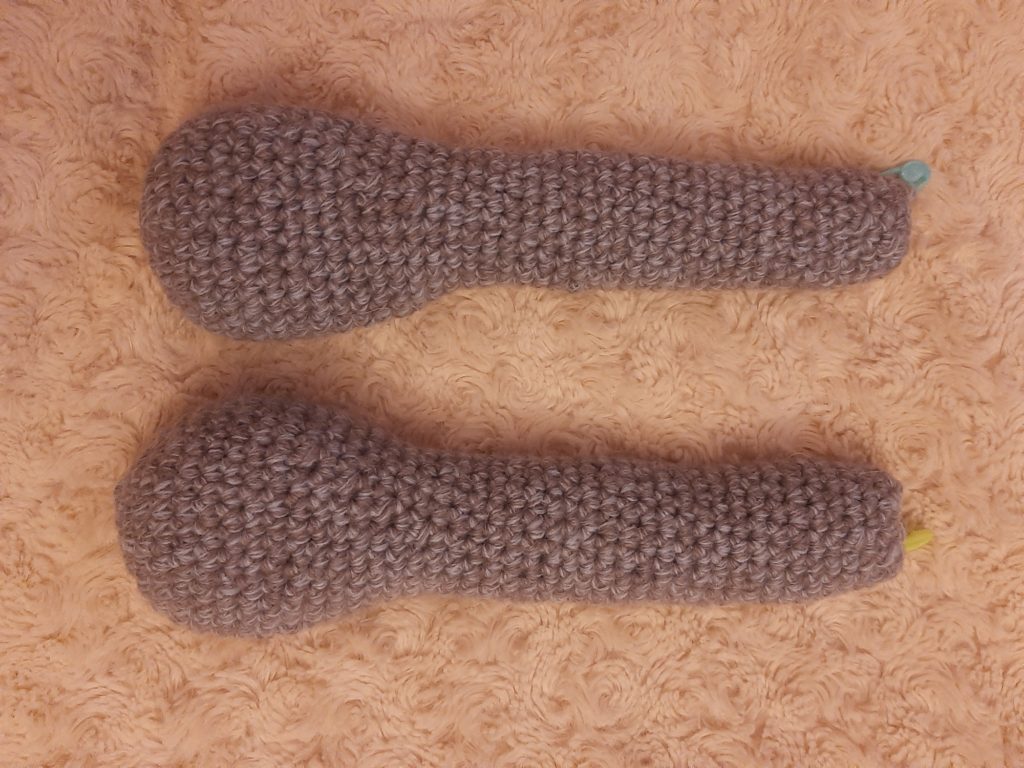
Basically the arms are a shorter version of the legs. The paw look is created by using some of the yarn as string and pulling it a certain way to create “fingers” and “toes”.
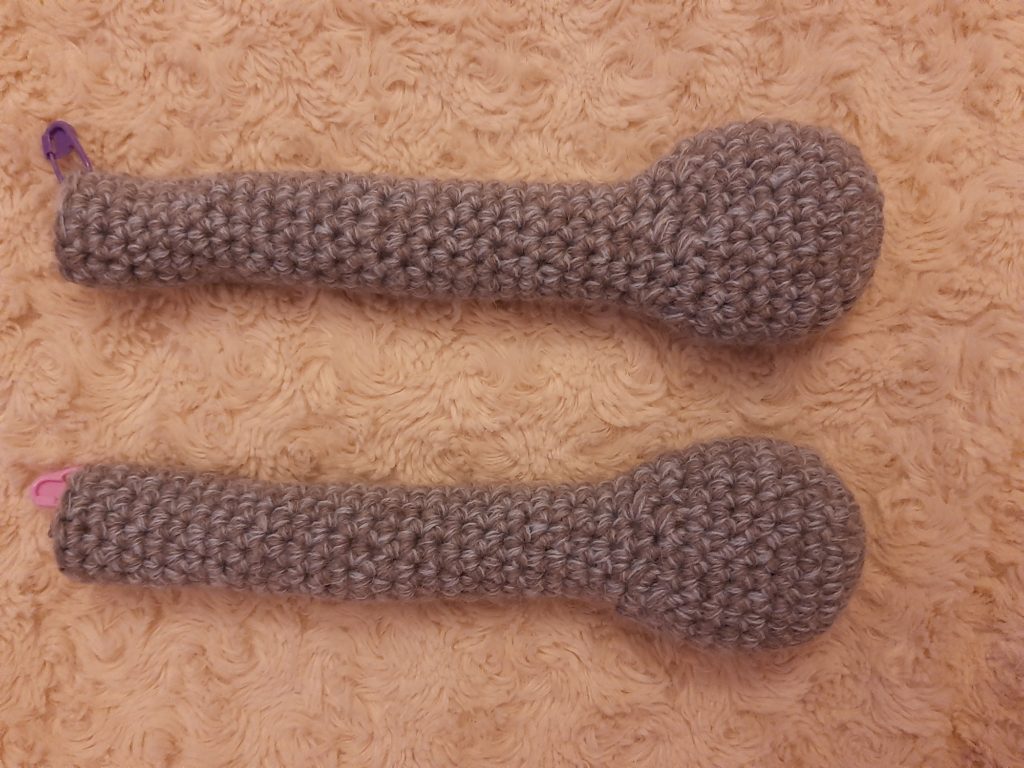
Stuff both the arms and the legs with fiber fill before you do any shaping and before you attach them.
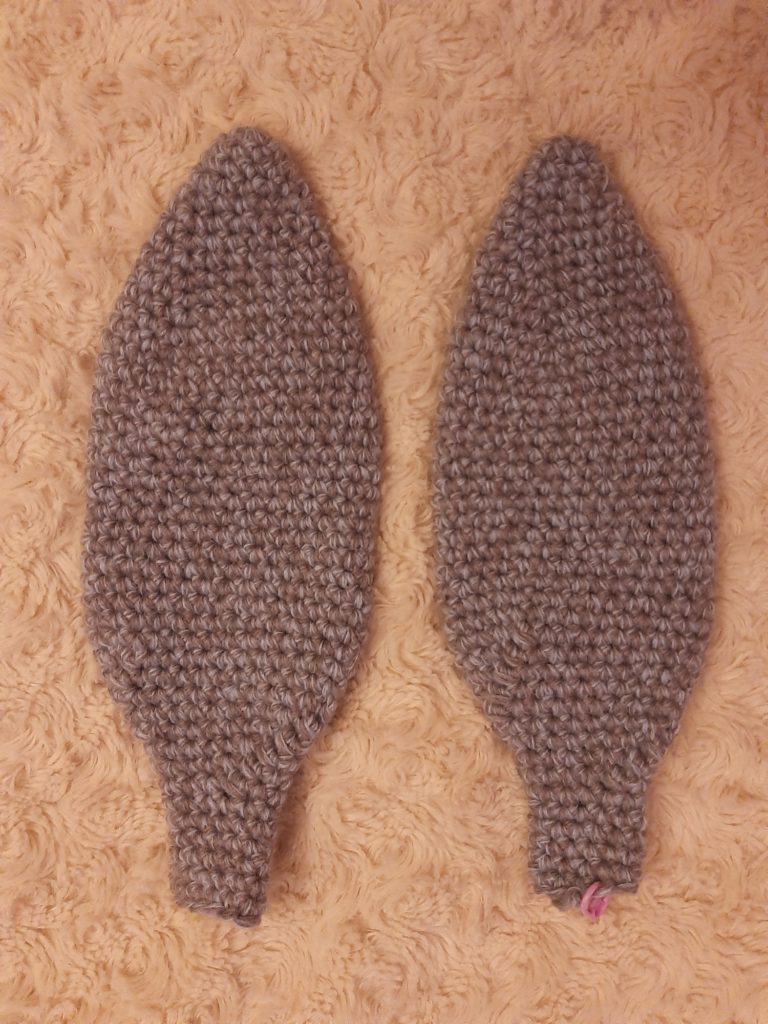
Finally you make the ears. They are kind of tube shaped, but you use them flat. Do not stuff the ears.
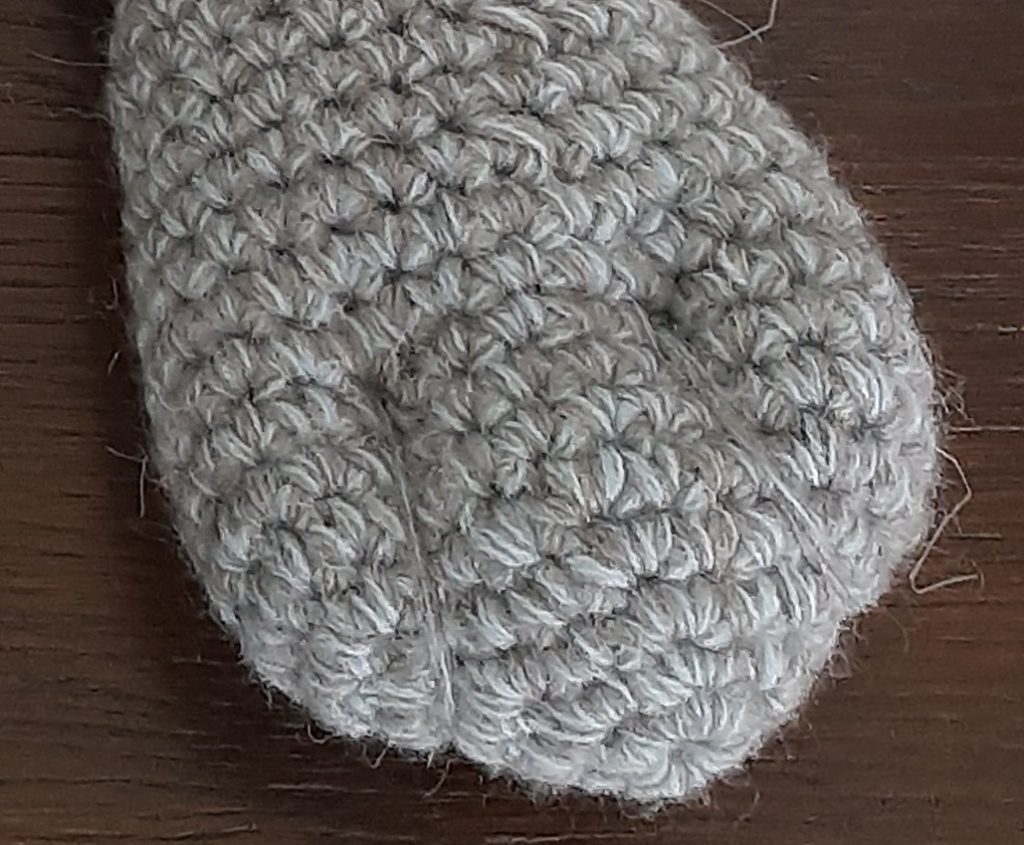
Now you make the eyes and the white belly part. They are all seperate pieces that you have to sew on afterwards. But they are small items so it doesn’t take long. I put a little bit of fiber fill under the white belly part. It makes it nice and cuddly.
belly eye

The eyelashes you stitch on after attaching the eyes. Also add a bit of pink soft yarn for the nose and shape the paws.
As you can see shaping the paws is done with two strings pulled tight. This creates “toes” and “fingers”.
Then it is time to assemble everything and start turning the pieces into Lucie Easter Bunny.
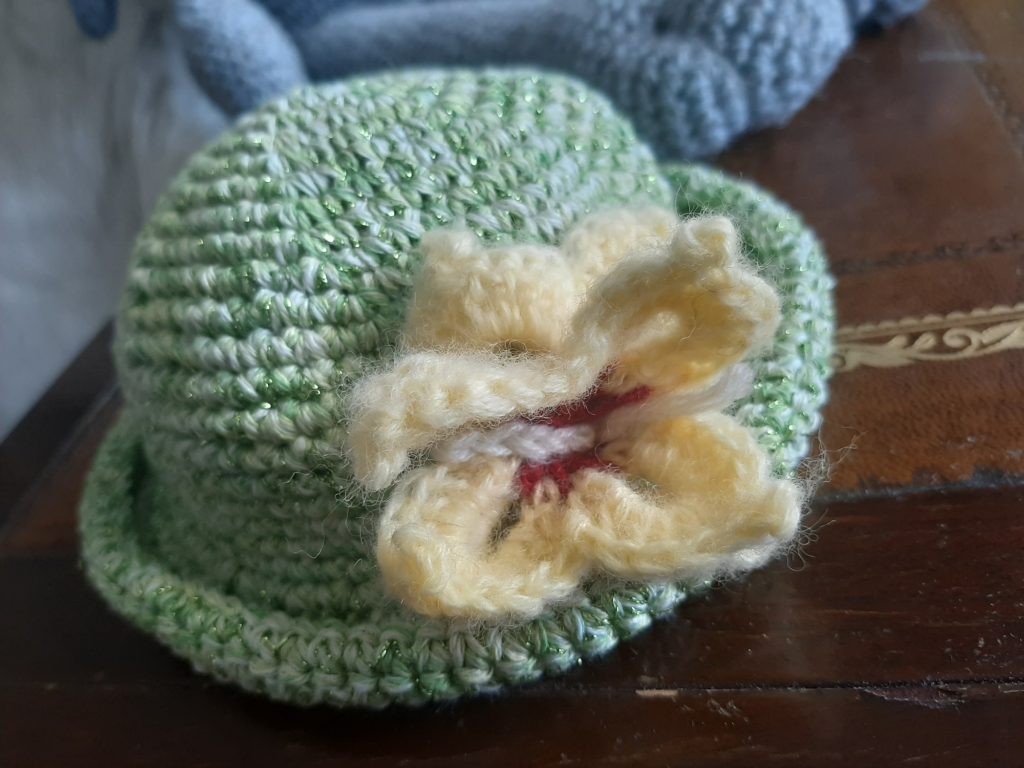
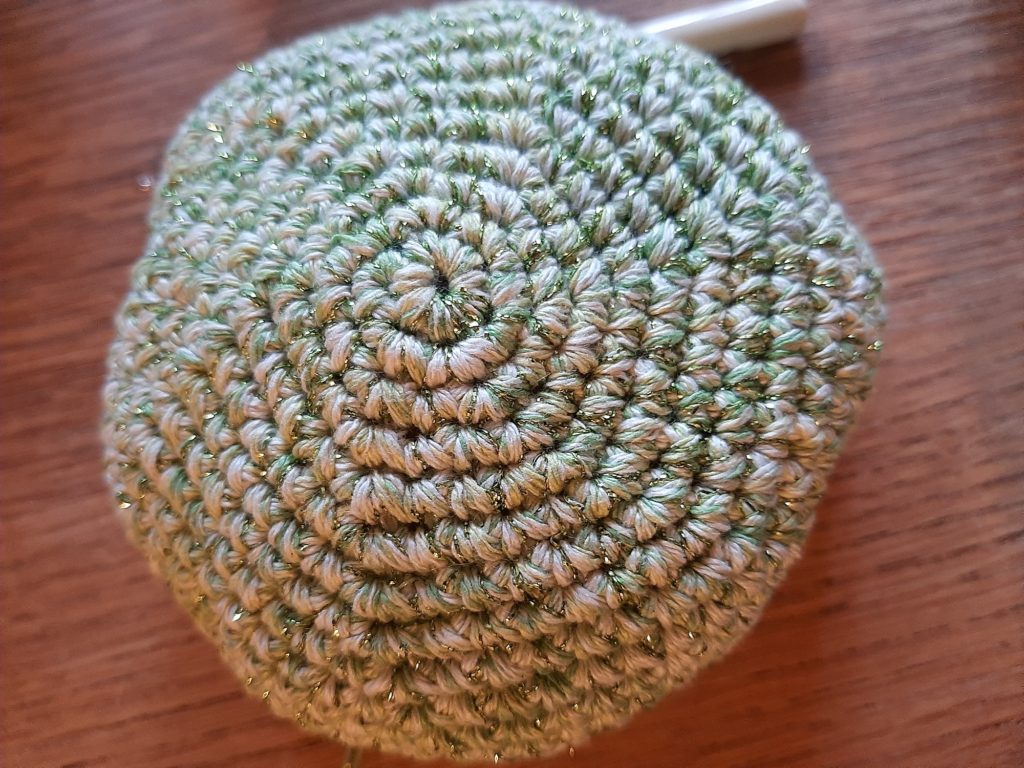
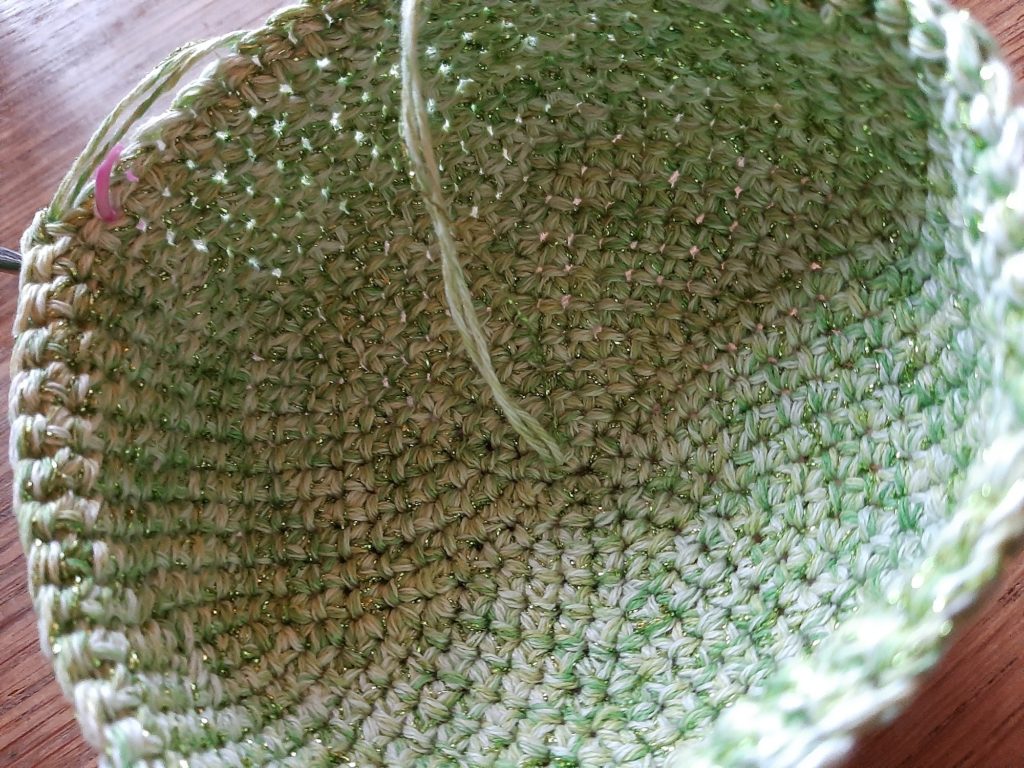
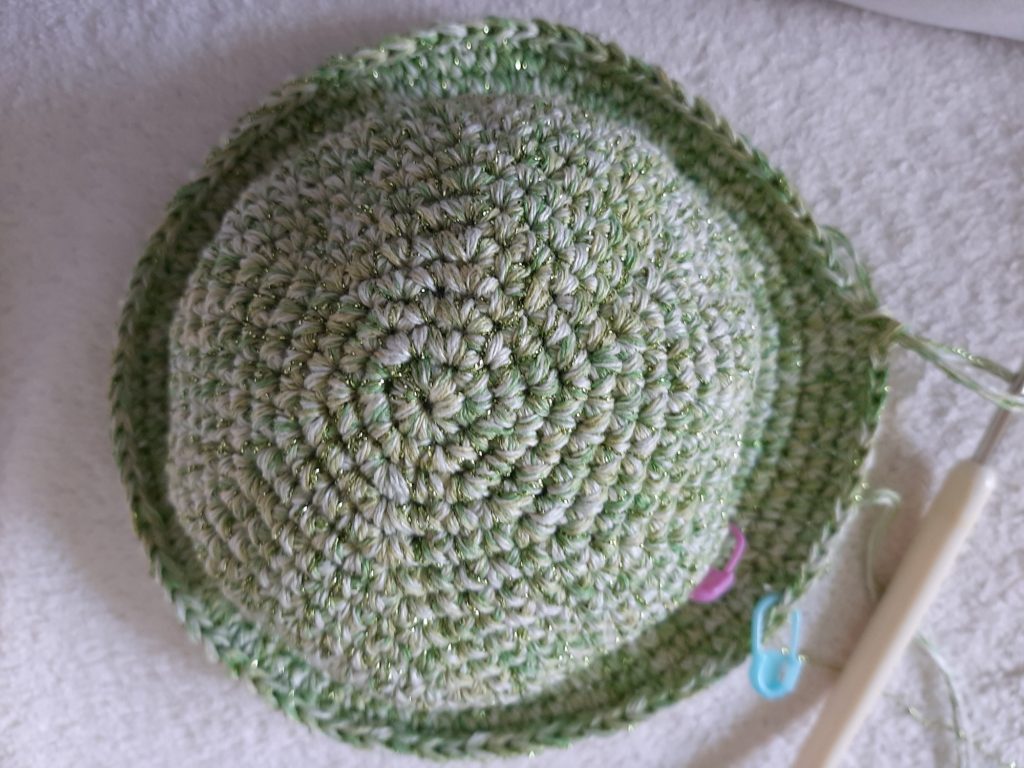
In the end you make the extras, like the hat and the butterfly. The hat starts like the head (and body) with a magic ring and crocheting in spiral rounds. It has to be slightly bigger so it will fit over the bunny ears. Instead of decreasing though you make a brim and fold it up a little.
top inside brim
Then make the butterfly. They are easy to make, but look delicate. I used transparent thread to attach it to the hat.
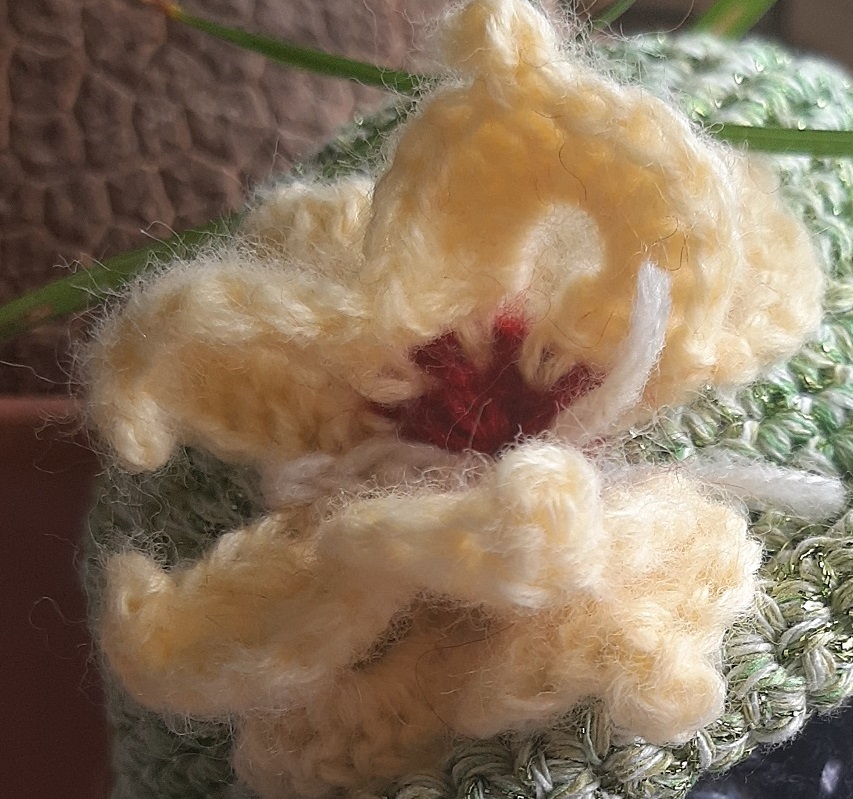
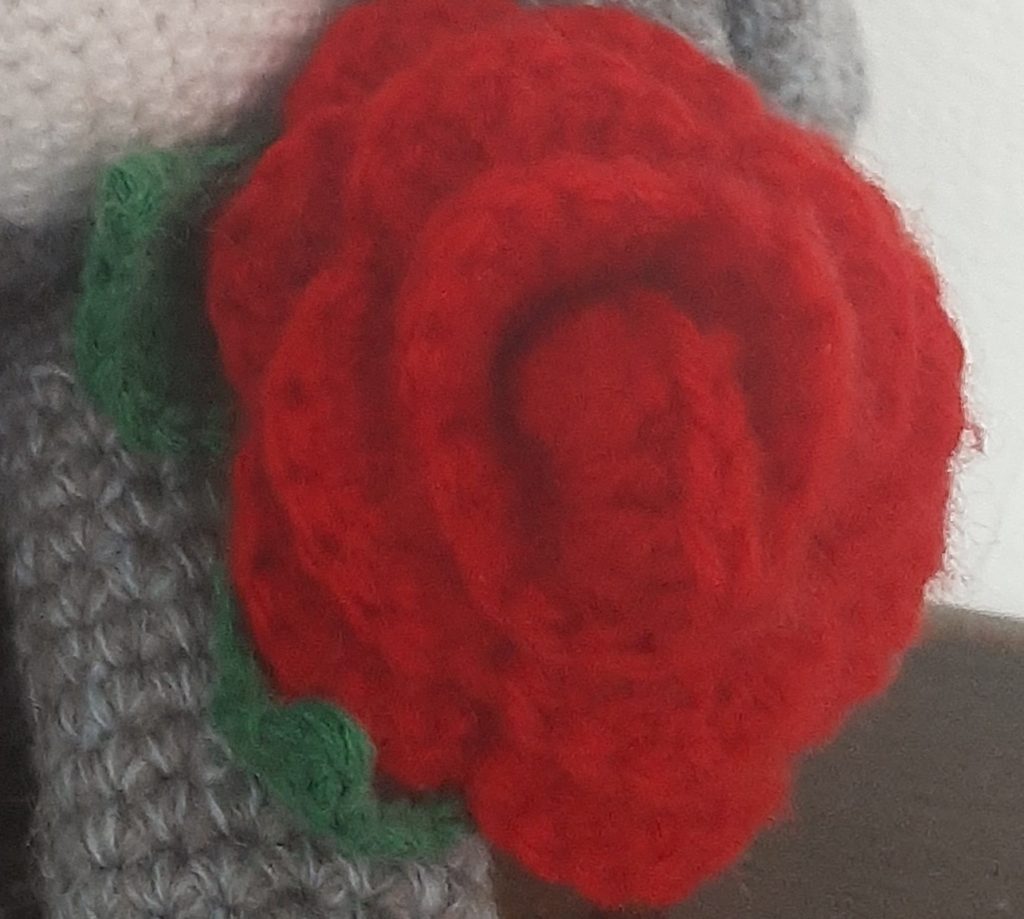
If you like flowers better then make e.g. a rose and attach it to the hat or any other flower you like. There are many directions you can find on YouTube.
And now Lucie Easter Bunny is finished. Kids will love her, but she is wonderful as decoration as well. The butterfly attachment might not be suitable for small children though.
Lucie Easter Bunny
Equipment
- Crocheting Hook No. 5 + 3.5
- darning needle
Materials
- 100 g gray yarn
- 30 g green yarn for the hat
- left over yarn in pink, white, black, yellow for nose, eyes, belly, butterfly
- 1 Pompom for the tail
Instructions
Head
- Start with a magic ring with 6 sc (single crochet). We work in spirals so do not join. This is your 1. Round. Make sure to use a marker at the ends of the rounds. It does help.2. Round: Double every stitch (2 sc in every stitch) – 12 stitches3. Round: 1sc into every stitch – 12 sts4. Round: Double every 2nd stitch – 18 sts5. Round: Double every 3rd stitch – 24 sts6. Round: Double every 4th stitch – 30 sts7. Round: Double every 5th stitch – 36 sts8. Round: Double every 6th stitch – 42 sts9.-10. Round: 1 sc into every stitch – 42 sts11. Round: Double every 7th stitch – 48 sts12.-18. Round: 1 sc into every stitch – 48 sts19. Round: Decrease every 7th stitch = sc 1 into the first 6 stitches then scdec over the next 2 (crochet them together as one) – 42 sts20. Round: Decrease every 6th stitch – 36 sts21. Round: Decrease every 5th stitch – 30 sts22. Round: Decrease every 4th stitch – 24 sts23. Round: 1sc into every stitch – 24 sts24. Round: Decrease every 3rd stitch – 18 sts25. Round: Decrease every 2nd stitch – 12 stsNow stuff the head with fiber fill before continuing (later the opening won’t be big enough anymore).26. Round: Decrease every stitch – 6 stsFasten off leaving a string for closing the opening. To close create a drawstring closure by weaving the string in and out of every stitch and pull the drawstring closed. Hide excess string.
Body
- Start with a magic ring with 6 sc (single crochet). We work in spirals so do not join. This is your 1. Round. Make sure to use a marker at the ends of the rounds. It does help.2. Round: Double every stitch (2 sc in every stitch) – 12 stitches3. Round: Double every 2nd stitch – 18 sts4. Round: Double every 3rd stitch – 24 sts5. Round: Double every 4th stitch – 30 sts6. Round: Double every 5th stitch – 36 sts7. Round:Double every 6th stitch – 42 sts8. Round: Double every 7th stitch – 48 sts9.-20. Round: 1 sc into every stitch – 48 sts21. Round: Decrease every 7th stitch = sc 1 into the first 6 stitches then scdec over the next 2 (crochet them together as one) – 42 sts22. Round: 1sc into every stitch – 42 sts23. Round: Decrease every 6th stitch – 36 sts24. Round: 1sc into every stitch – 36 sts25. Round: Decrease every 5th stitch – 30 sts26.-27. Round: 1 sc into every stitch – 30 sts28. Round: Decrease every 4th stitch – 24 sts29.-30. Round: 1 sc into every stitch – 24 sts31. Round: Decrease every 3rd stitch – 18 sts32.-33. Round: 1 sc into every stitch – 18 stsFasten off leaving a string (for sewing on the head later) and stuff the body with fiber fill.
Arms
- Start with a magic ring with 6 sc (single crochet). We work in spirals so do not join. This is your 1. Round. Make sure to use a marker at the ends of the rounds. It does help.2. Round: Double every stitch (2 sc in every stitch) – 12 stitches3. Round: Double every 2nd stitch – 18 sts4. Round: Double every 3rd stitch – 24 sts5. Round: Double every 4th stitch – 30 sts6.-10. Round: 1 sc into every stitch – 30 sts11. Round: Decrease every 9th stitch, you will have some extra stitches at the end of the round (and in rounds 13, 15, 17, 41, 43), that’s ok – 27 sts 12. Round: 1sc into every stitch – 27 sts13. Round: Decrease every 8th stitch – 24 sts14. Round: 1sc into every stitch – 24 sts15. Round: Decrease every 7th stitch – 21 sts16. Round: 1sc into every stitch – 21 sts17. Round: Decrease every 6th stitch – 18 stsIt’s good to start stuffing the arm at this point as it gets harder the longer the arm is.18.-40. Round: 1 sc into every stitch – 18 sts41. Round: Decrease every 5th stitch – 15 sts42. Round: 1sc into every stitch – 15 sts43. Round: Decrease every 4th stitch – 12 sts44. Round: 1sc into every stitch – 12 stsFasten off leaving a string (for sewing it onto the body later) and stuff the arm with fiber fill.Now make the second arm just like the first.
Legs
- Start with amagic ring with 6 sc (single crochet). We work in spirals so do not join. This is your 1. Round. Make sure to use a marker at the ends of the rounds. It does help.2. Round: Double every stitch (2 sc in every stitch) – 12 stitches3. Round: Double every 2nd stitch – 18 sts4. Round: Double every 3rd stitch – 24 sts5.-10. Round: 1 sc into every stitch – 24 sts11. Round: Decrease every 3rd stitch – 18 sts12. Round: Decrease every 2nd stitch – 12 stsIt’s good to start stuffing the leg at this point as it gets harder the longer the leg is.13.- 40. Round: 1 sc into every stitch – 12 stsFasten off leaving a string (for sewing it onto the body later) and stuff the leg with fiber fill.Now make the second leg just like the first.
Ears
- Start with amagic ring with 6 sc (single crochet). We work in spirals so do not join. This is your 1. Round. Make sure to use a marker at the ends of the rounds. It does help.2. Round: Double the 1. stitch, one sc in the next two stitches, double the next stitch and one sc in the next two stitches. We will increase by 2 every round – 8 sts3. Round: One sc in 1. stitch, double the next stitch, one sc in the next three stitches, double the next stitch, one sc in the next two stitches – 10 sts4. Round: One sc in stitch 1 + 2, double the next stitch, one sc in the next 4 stitches, double the next stitch, one sc in the next two stitches – 12 sts5. Round: One sc in stitches 1 – 3, double the next stitch, one sc in the next 5 stitches,double the next stitch, one sc in the next two stitches – 14 sts6. Round: One sc in stitches 1 – 4, double the next stitch, one sc in the next 6 stitches, double the next stitch, one sc in the next two stitches – 16 sts7. Round: One sc in stitches 1 – 5, double the next stitch, one sc in the next 7 stitches, double the next stitch, one sc in the next two stitches – 18 sts8. Round: One sc in stitches 1 – 6, double the next stitch, one sc in the next 8 stitches, double the next stitch, one sc in the next two stitches – 20 sts9. Round: One sc in stitches 1 – 7, double the next stitch, one sc in the next 9 stitches, double the next stitch, one sc in the next two stitches – 22 sts10. Round: One sc in stitches 1 – 8, double the next stitch, one sc in the next 10 stitches, double the next stitch, one sc in the next two stitches – 24 sts11. Round: One sc in stitches 1 – 9, double the next stitch, one sc in the next 11 stitches, double the next stitch, one sc in the next two stitches – 26 sts12. Round: One sc in stitches 1 – 10, double the next stitch, one sc in the next 12 stitches, double the next stitch, one sc in the next two stitches – 28 sts13. Round: One sc in stitches 1 – 11, double the next stitch, one sc in the next 13 stitches, double the next stitch, one sc in the next two stitches – 30 sts14.-30. Round: 1 sc into every stitch – 30 sts31. Round: One sc in stitches 1 – 13, decrease the next stitch, one sc in the next 13 stitches, decrease the next stitch – 28 sts32. Round: One sc in stitches 1 – 12, decrease the next stitch, one sc in the next 12 stitches, decrease the next stitch – 26 sts33. Round: One sc in stitches 1 – 11, decrease the next stitch, one sc in the next 11 stitches, decrease the next stitch – 24 sts34. Round: One sc in stitches 1 – 10, decrease the next stitch, one sc in the next 10 stitches, decrease the next stitch – 22 sts35. Round: One sc in stitches 1 – 9, decrease the next stitch, one sc in the next 9 stitches, decrease the next stitch – 20 sts36. Round: One sc in stitches 1 – 8, decrease the next stitch, one sc in the next 8 stitches, decrease the next stitch – 18 sts37. Round: One sc in stitches 1 – 7, decrease the next stitch, one sc in the next 7 stitches, decrease the next stitch – 16 sts38. Round: One sc in stitches 1 – 6, decrease the next stitch, one sc in the next 6 stitches, decrease the next stitch – 14 sts39. Round: One sc in stitches 1 – 5, decrease the next stitch, one sc in the next 5 stitches, decrease the next stitch – 12 sts40.-45. Round: 1 sc into every stitch – 12 stsFasten off leaving a string (for sewing on the head later) and flatten the ear.Now make the second ear just like the first.
Hat
- Start with a magic ring with 6 sc (single crochet). We work in spirals so do not join. This is your 1. Round. Make sure to use a marker at the ends of the rounds. It does help.2. Round: Double every stitch (2 sc in every stitch) – 12 stitches3. Round: 1sc into every stitch – 12 sts4. Round: Double every 2nd stitch – 18 sts5. Round: Double every 3rd stitch – 24 sts6. Round: Double every 4th stitch – 30 sts7. Round: Double every 5th stitch – 36 sts8. Round: Double every 6th stitch – 42 sts9. Round: Double every 7th stitch – 48 sts10. Round: Double every 8th stitch – 54 sts11.-13. Round: 1 sc into every stitch – 54 sts14. Round: Decrease every 8th stitch – 48 sts15.-18. Round: 1 sc into every stitch – 48 sts19. Round: Double every 2nd stitch – 96 sts20.-23. Round: 1 sc into every stitch – 96 stsFasten off and hide left over string. Shape the hat and lightly bend up the brim a little.
Belly
- Use: Crocheting Hook No. 3,5. Start with a magic ring with 6 sc (single crochet). We work in spirals so do not join. This is your 1. Round. Make sure to use amarker at the ends of the rounds. It does help.2. Round: Double every stitch (2 sc in every stitch) – 12 stitches3. Round: 1sc into every stitch – 12 sts 4. Round: Double every 2nd stitch – 18 sts5. Round: Double every 3rd stitch – 24 sts6. Round: Double every 4th stitch – 30 sts7. Round: Double every 5th stitch – 36 sts8. Round: Double every 6th stitch – 42 sts9. Round: Hdc (half double crochet) in the first stitch, then dc (double crochet) in the next 2 stitches, tr (treble crochet) in the next stitch, dc in the next 2 stitches, hdc in the next stitch, one sc in next 37 stitches.Fasten off and hide excess string.
- Now with the darning needle sew all the pieces together and hide excess string.